Two nights ago, my dear friend Monica married her Prince Charming
Craig. She floated down the aisle like a
princess, her face aglow with love and happiness. And the look of love exchanged between her
and Craig made me tear up. I kept taking
deep breaths and thinking about all my autumn garden chores to hold it
together. You see, both Monica and Craig
had prior marriages that ended in divorce.
They moved forward raising their kids until, unexpectedly, they met and
fell madly in love. This is what I have wanted
for Monica; a wonderful kind man to love and adore her. To finally make this wonderful Disney obsessed
single mother feel like the princess she is.
She embodied every current and future Disney princess as she entered the
church and we stood and smiled on. And I
wiped away a stray tear. What struck me
as they said their vows, is just how courageous they were. It takes real bravery to trust in love again
and build a new family. Their daughters cried joyful tears during the ceremony
and I felt so happy for them that I could have burst. And after a weekend spent with family they
are heading off to Disneyland, the happiest place on earth.
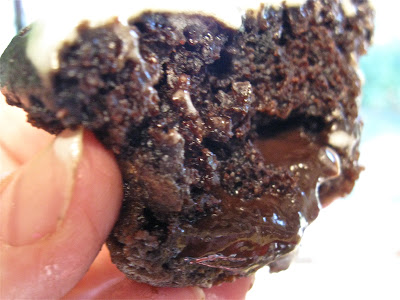
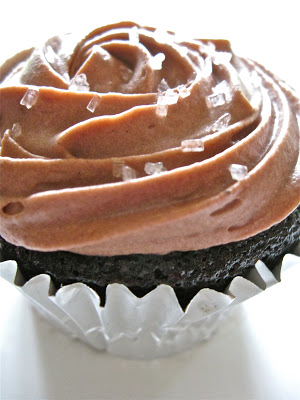 |
| Happily Ever After Chocolate Truffle Cupcake |
I baked the wedding cupcakes. Prior to this event, I had baked maybe four
batches of cupcakes in my life, one of which you have already seen on this
blog. (But in my defense I have baked over 20 cakes this year while I was
testing recipes.) I was nervous so I
went into research mode and checked out every cupcake cookbook at the public
library; 23 cupcake books in total, including Zombie Cupcakes by Zilly Rosen
just for some added levity. After
flipping through all those cupcake books, I learned that cupcakes are supposed
to be cute. The emphasis was on the cute
appearance and the cake being light and fluffy.
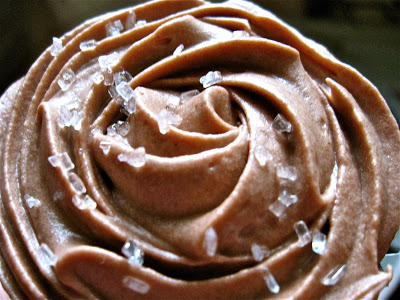
But, I already knew that my friends were going to frost the
cupcakes with cream cheese frosting in a simple rose. I wanted to make a seductive cupcake recipe
that a chocolate lover could savor. I
just didn’t find that recipe in my research.
So, I decided to create a new recipe.
I started by tweaking Monica’s family chocolate cake recipe
by adding a chocolate ganache center to the cupcake, which was lovely. But, the cupcake texture was a bit too
crumbly which often happens when you make a cake recipe into a cupcake. So, I added some bread flour because the
protein amount is higher and makes the crumb sturdier. And then I let my inner chocoholic go crazy,
I added Dutch processed cocoa for a more intense chocolate flavor, my favorite
Scharffen Berger cocoa powder, a couple of glugs of Godiva Chocolate Liqueur,
instant espresso powder, and more vanilla.
I baked up half the batter with the ganache center and they were nice,
but not amazing.
Now, the next part of the recipe developed from a physical
challenge. This past August, I received
PRP injections in my right knee and ankle to help grow some new ligament
tissue. And it worked! Which is amazing and exciting and also
painful, like most change is. And I didn’t
really think the timing through because a PRP injection leaves your ligaments
severely sprained. So, I can stand for about
fifteen minutes in the kitchen before I want to start cursing from the
pain. And then I go ice my foot and
calf until it’s numb and go back into the kitchen. This meant that I had to break up the tasks
into manageable steps. And some nights I just had to call it early. So, I put the trial cake batter into the
fridge for the night. The next day when My Kid came over for dinner, I pulled out the cake
batter and baked up some cupcakes to send home with him. And those cupcakes were fantastic. So, refrigerating the batter was the
trick. And I knew that I was almost
there. But, they needed another tweak.
A couple of days later, My Pirate and I were walking through
Lowe’s talking about the cupcakes, and he said, “What if you put a truffle cake
center in the cupcake?” And a light bulb went off in my head; I could put a layer of truffle cake in the
bottom of each cupcake! When I want to throw a culinary pass at My Pirate, I make
him
The Winning Hearts and Minds Cake that I found on Molly Wizenberg's blog, Orangette, and in her book, A Homemade Life.
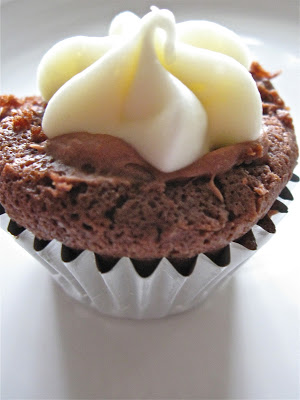 |
| The Winning Hearts and Minds miniature cupcake |
I tested several versions of the cupcakes with different
proportions of batters and chocolate ganache. And then I refrigerated or froze
them overnight. The cupcakes that were
frozen and then unthawed won our taste testing.
I then distributed all my test subjects to my neighbors and a friend’s
family dinner.
This is what I came up with.
I made up the cake batter and put it in the fridge for the night. The next day I heated up the chocolate
ganache and put it in the fridge for 20 minutes. While the chocolate ganache chilled I made
The Winning Hearts and Minds Cake batter.
And then I put two tablespoons of The Winning Hearts and Minds Cake
batter in the bottom of the cupcake liner, poured in two more tablespoons of
the chocolate cake batter. And pushed in
½ teaspoon of ganache on top of each cupcake.
Then I put them in the oven. Let them cool to room temperature. Then wrap them up and freeze for at least 24
hours. Remove from freezer and they will
come to room temp in about an hour.
I baked off the cupcakes for the wedding and wrapped them up
and put them in the freezer. Before I
returned my library books, I flipped back through Southern Living’s Big Book of
Cupcakes by Jan Moon and found a chocolate cream cheese frosting recipe. All you do is add 1/3 cup of cocoa powder to
each pound of powdered sugar that you add to the frosting. So, I mirrored all the different forms of
chocolate in the cake into the frosting.
When My Pirate tasted it on the cupcake, he giggled like a little
girl. The neighbor sighed and asked me
how I did it. And a couple of my friends
closed their eyes and savored every bite.
And I knew that it was ready to be served at a wedding that was all
about second chances and true love.
This cupcake is worth the extra time that it takes and the
postponed gratification. Don’t serve
this at a five year old’s birthday party! No, this is an adult cupcake best
shared with someone that you passionately love or at your dear friend’s
wedding.
Happily Ever After
Cake Batter
Adapted from Markum Best
Chocolate Cake
2 cups flour
1 cup bread flour
2 cups sugar—I used vanilla sugar
6 tablespoons Hershey's Cocoa
2 tablespoons Scharffen Berger cocoa
2 tablespoons Godiva Chocolate Liqueur
4 tablespoons Dutch processed cocoa
2 teaspoons baking soda
1 teaspoon salt
1/2 cup vegetable oil
2 cups warm water
1 teaspoon instant espresso powder
2 tablespoons vinegar
2 teaspoons vanilla—the good stuff
Place dry ingredients in a bowl and whisk together. Mix wet ingredients together. Pour wet ingredients into flour mixture and
stir until it just combines. Refrigerate
for 2 to 24 hours.
Chocolate Ganache
By Cook’s Illustrated
2 ounces bittersweet chocolate,
chopped fine
¼ cup heavy cream
1 tablespoon confectioner’s sugar
Place chocolate, cream, and
confectioner’s sugar in medium microwave bowl. Heat in microwave on high power until mixture is warm to touch, 20 to 30
seconds. Whisk until smooth; transfer
bowl to refrigerator and let stand until just chilled, no longer than thirty
minutes.
Winning Hearts and Minds Cake
Gâteau au chocolat fondant de Nathalie
And tweaked by Laura Heldreth
7 ounces (200 grams) best-quality dark chocolate
7 ounces (200 grams) unsalted butter, cut into ½-inch
cubes
1 1/3 cup (250 grams) granulated sugar—vanilla sugar works great
1 teaspoon instant espresso powder
1 teaspoon Kosher salt
tiny pinch of red cayenne pepper powder
splash of Godiva Chocolate Liquor
1 tablespoon Dutch processed cocoa
1 tablespoon Scharffen Berger
1 teaspoon vanilla
5 large eggs
1 Tbs flour
Finely chop the chocolate (a serrated bread knife does an
outstanding job of this) or use Ghiradelli chips and melt it gently with the
butter in the microwave, stirring regularly to combine. I use the microwave in
30 second bursts and it works great. Add
the sugar, instant espresso powder, salt, cayenne, vanilla, Scharffen Berger,
and Dutch processed cocoa to the chocolate-butter mixture, stirring well, and
set aside to cool for a few moments. Then add the eggs one by one, stirring
well after each addition, and then add the flour. The batter should be smooth,
dark, and utterly gorgeous.
Happily Ever After
Chocolate Truffle Cupcakes
Make the Happily Ever After Chocolate Cake batter and
refrigerate for 2 to 24 hours.
Heat your oven to 350 degrees.
Then, make the chocolate ganache and refrigerate for up to 30
minutes. While it chills, mix up The
Winning Hearts and Minds Cake batter.
Line your cupcake pans.
Place 2 tablespoons of the Winning Hearts and Minds Cake batter
in the bottom of the cupcake liner. Put
two more tablespoons of the Happily Ever After Chocolate Cake batter in the
cupcake liner. Top the batter with ½
teaspoon of chocolate ganache. Place in oven and bake for 17 to 19
minutes. My cupcakes took 19 minutes in
my oven.
Cool in pan for ten minutes.
Then place on a cooling rack until room temperature, about one
hour. Then wrap in plastic wrap and
foil. Put in freezer overnight. You can freeze them up to a month if they are
wrapped well. To unthaw, unwrap the
cupcakes and place on a cookie sheet for one hour.
Chocolate
Cream Cheese Frosting –Adapted from Fine Cooking
1-1/4 lb.
cream cheese, at room temperature
2-1/2
sticks (1-1/4 cups) unsalted butter, at room temperature
2
tsp. vanilla extract
2/3
cup of combined cocoas—Hershey’s, Scharffen Berger, Dutch processed
1
(2-lb.) bag confectioners’ sugar (about 7-1/4 cups)
splash
of Godiva Chocolate Liqueur (optional)
To
make the frosting
Beat
the cream cheese, butter, and vanilla together in the bowl of a stand mixer (or
in a large bowl if using a hand mixer) on low speed to combine. Increase the
speed to medium-high and beat until aerated and light, about 2 minutes. Place
confectioners’ sugar and cocoa in a separate bowl and whisk together. Stop the
mixer and add a few cups of the confectioners’ sugar, incorporating it into the
cream cheese mixture on low speed until combined. Repeat with the remaining
sugar, adding it to the mixer in two additions. Once all of the sugar is added,
pour in a splash of chocolate liqueur then increase the speed to medium-high
and beat until fluffy, about 1 minute.
I also made miniature cupcakes with The Winning Hearts and Minds
Cake batter. I baked them off at 350
degrees for twelve minutes. And the
bride and groom fed them to each other for the cake slicing ceremony. They were the perfect bite size.
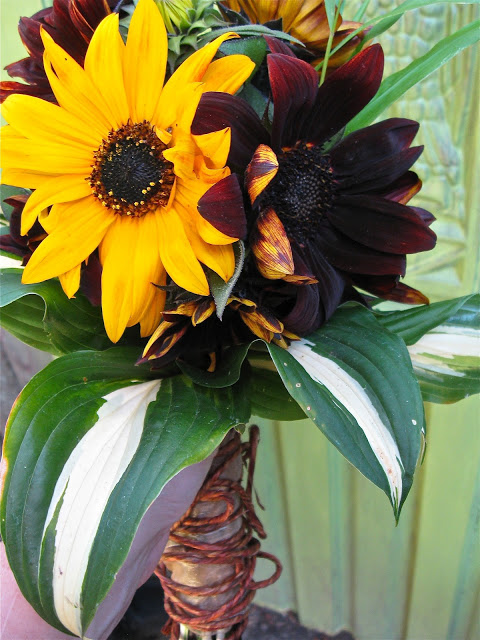
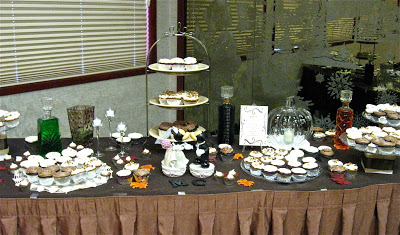 |
| Monica's wedding cupcake display |